Switching to Case-Sensitive File System on Mac OS X
Introduction
On Mac OS X, the default file system is case-insensitive. However, you can switch to a case-sensitive file system if needed. This is particularly useful for certain applications or development environments that require case sensitivity.
Instead, it is preferable to create a dedicated volume (not a partition) with a case-sensitive file system. This way, you can keep your main volume case-insensitive while having a separate volume for applications that require case sensitivity. The other advantage is that you won’t encounter any issue with TimeMachine backups and restoring your system (you can’t restore a case-sensitive volume to a case-insensitive one without a long and painful procedure).
Create a new volume
To create a new volume with a case-sensitive file system, follow these steps:
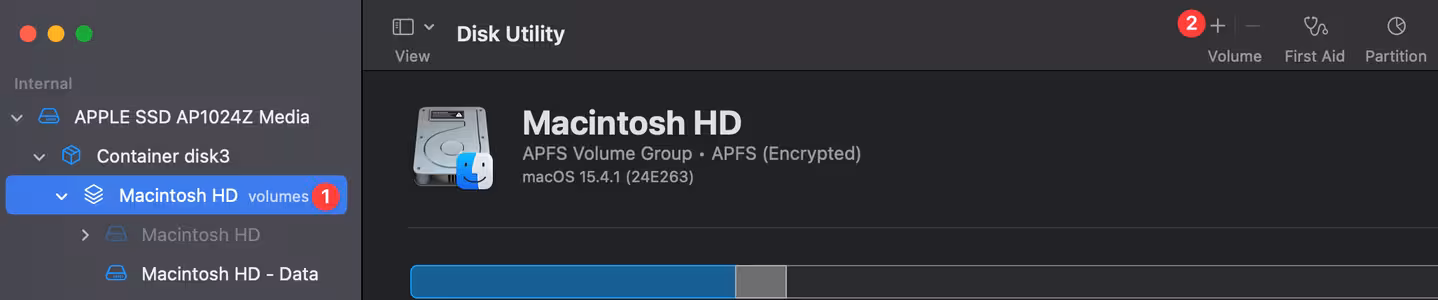
- Open Disk Utility (found in Applications > Utilities).
- Select your main disk (usually named “Macintosh HD”).
- Click on the + sign next to Volume.
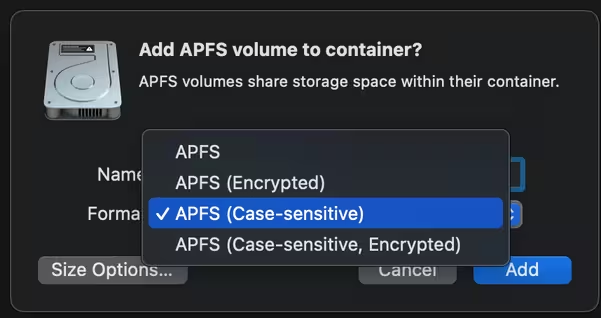
Choose a name for the new volume (e.g., “workspace”) and set it to APFS (Case-sensitive) or APFS (Case-sensitive, Encrypted) (it’s recommended to use the Encrypted for security reasons):
Use the new volume
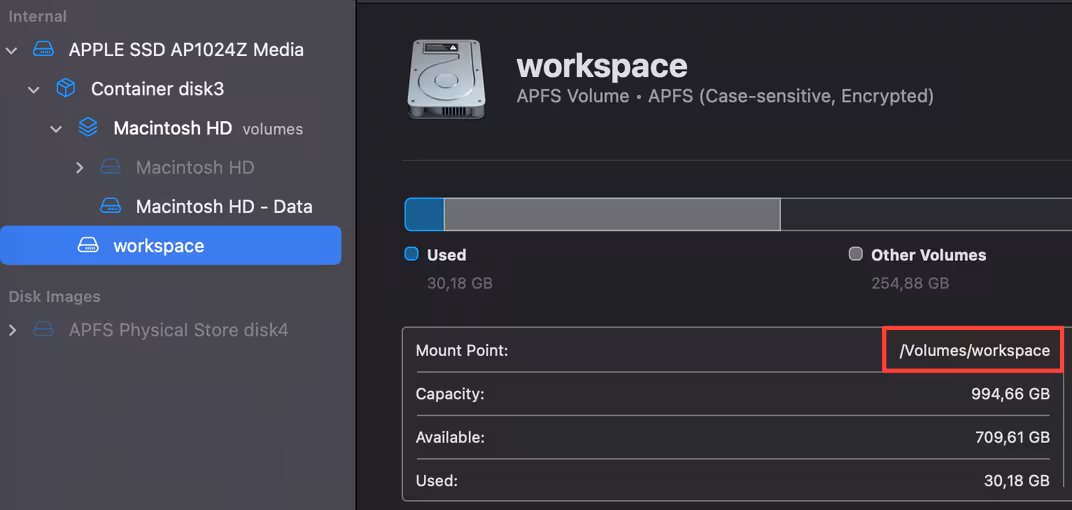
Once the new volume is created, you should see it and find relecant information. You can use it for applications or development environments that require a case-sensitive file system.
From the terminal, create a symbolic link to the new volume:
ln -s /Volumes/workspace ~/workspace
This will create a symbolic link in your home directory that points to the new volume. You can now use ~/workspace as a path to access the case-sensitive volume. It’s very useful for development purposes, especially if you are using a version control system like Git or Mercurial that may have issues with case-insensitive file systems.
Last updated 02 May 2025, 16:11 CEST.