HyperHDR with Raspberry Pi Zero 2W
I really love the HyperHDR project. I use it to control my LED strips on my Sony TV. I've even designed a 3D case to put my Raspberry Pi Zero 2W and all the requirements in one place.
Prerequisites
Operating system
I use Raspberry Pi OS. The latest version is Raspberry Pi OS (64-bit) Lite.
Kernel fix
We'll start to install a Kernel fix with DKMS. Run this as root:
Then answer 1 for RPi:
Then reboot.
Installation
Create a hyperhdr user and connect with it:
HyperHDR install is straightforward:
At the end, you should see something like this:
You can now access the web interface at http://<your-rpi-ip>:8090.
OS Configuration
Video device permissions
Now allow hyperhdr user to access video devices:
Enable service
Enable the service to enable reboot persistence:
Read only file system
Info
It will protect your Raspberry Pi system from corruption if you don't have a dedicated & safe powering off mechanism for the Rpi. And will extend the life of your SD card since all writes will be stored in the memory.
Once you've a working HyperHDR and won't update it for some time, you can enable the read only file system:
- Run
sudo raspi-config - Select
Performance Options - Select
P2 Overlay File System Enable/disable read-only file system - Select
Yes
Then reboot.
HyperHDR configuration
LUT
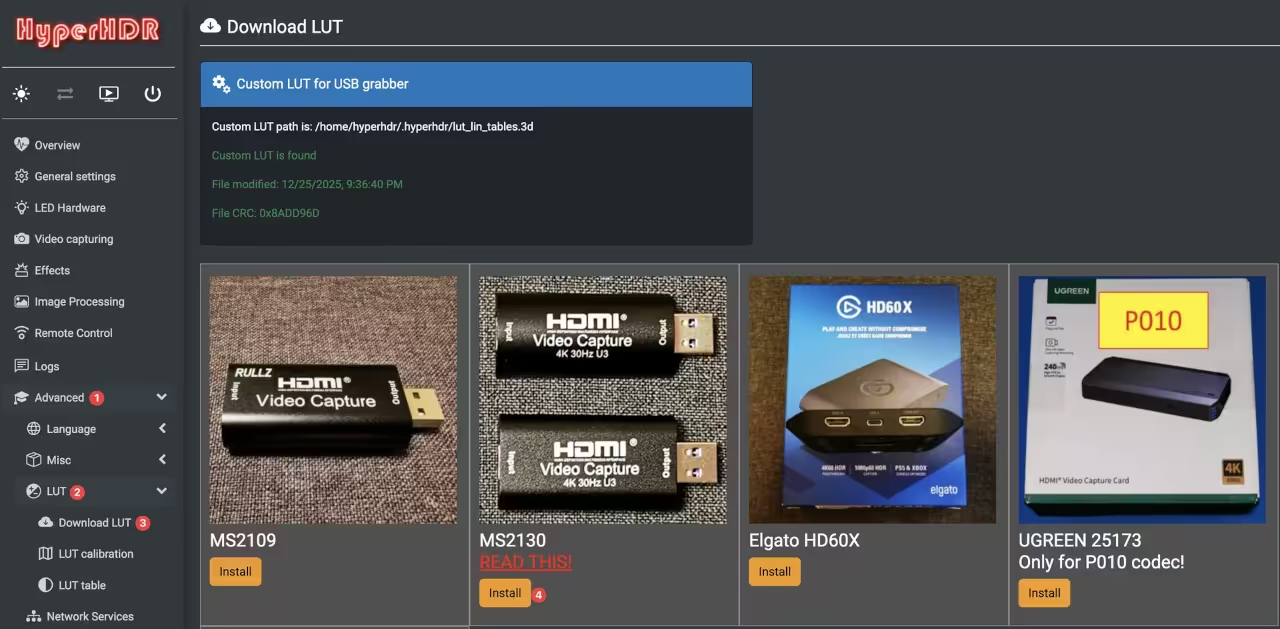
First we have to download LUT files based on your hardware config:
Video capturing
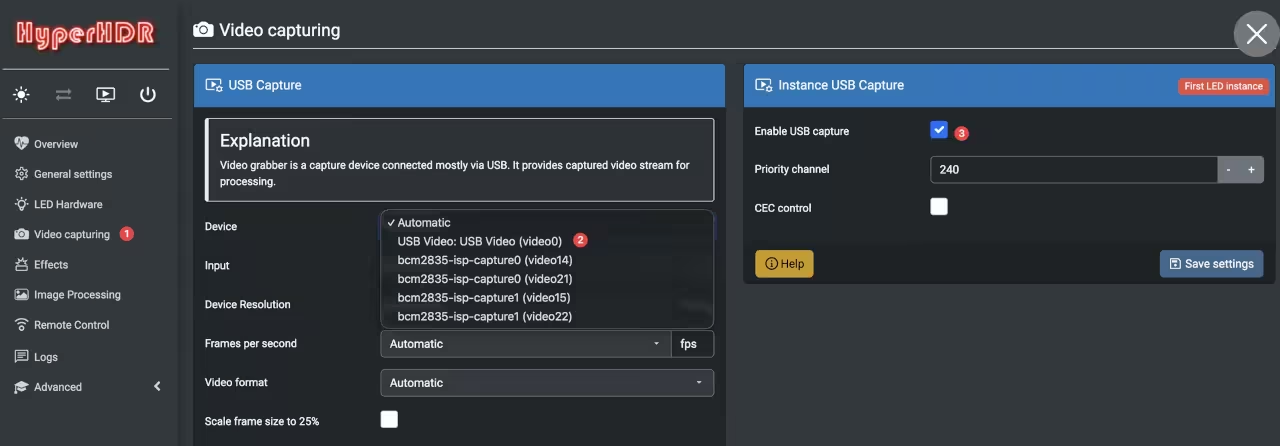
To configure video capturing, leaving everything to automatic should be enough. I just advise you to check the Auto resume box:
LED strip configuration
Led hardware
Using an ESP32 with WLED is a very good thing to manage effitently your LED strip with and without HyperHDR.
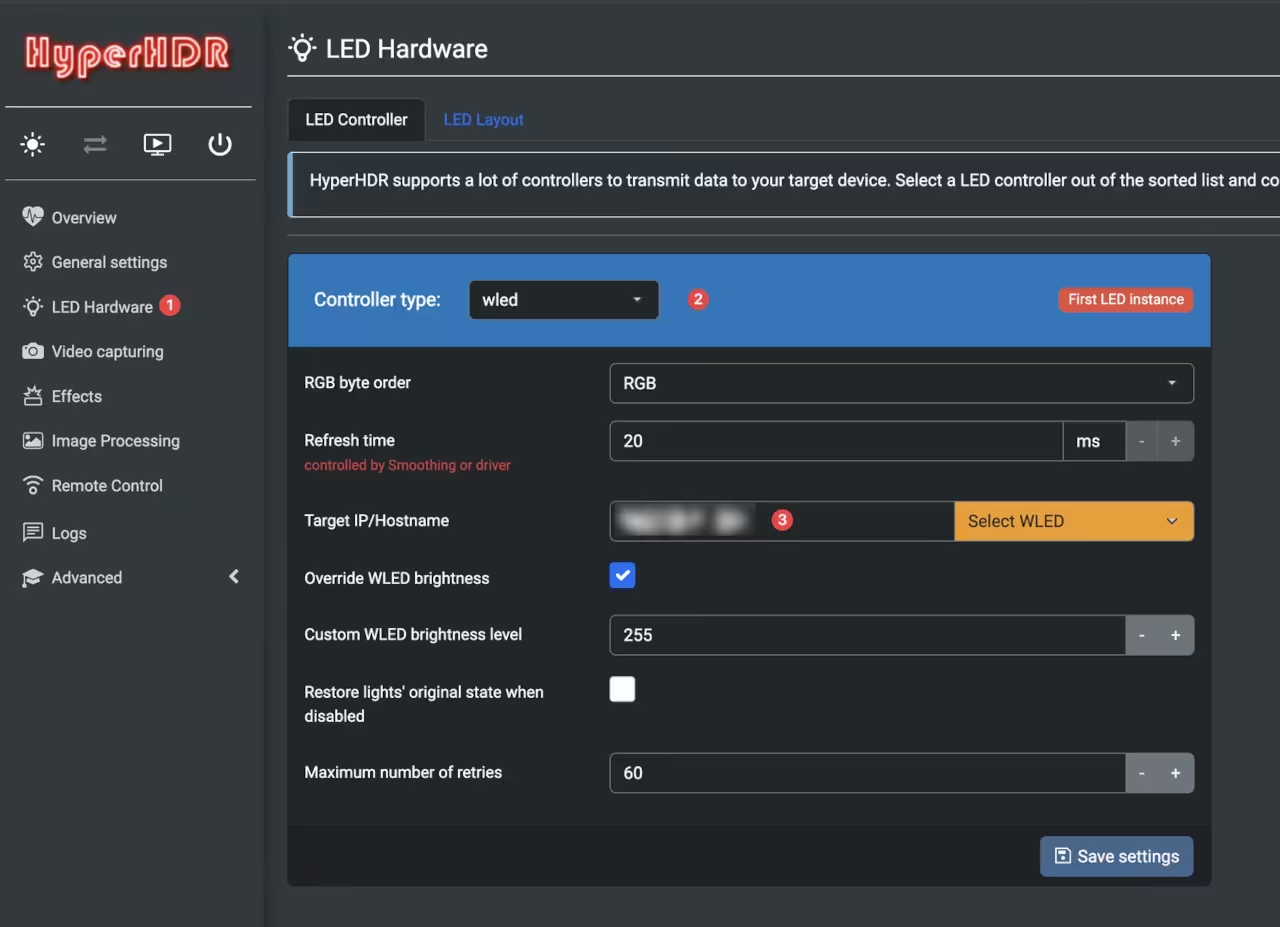
So you have to configure the endpoint:
Note
You have to properly configure WLED first, ensuring the voltage, number of LEDs, and the correct protocol are set. Don't go to the LED layout configuration without having a working WLED.
LED layout
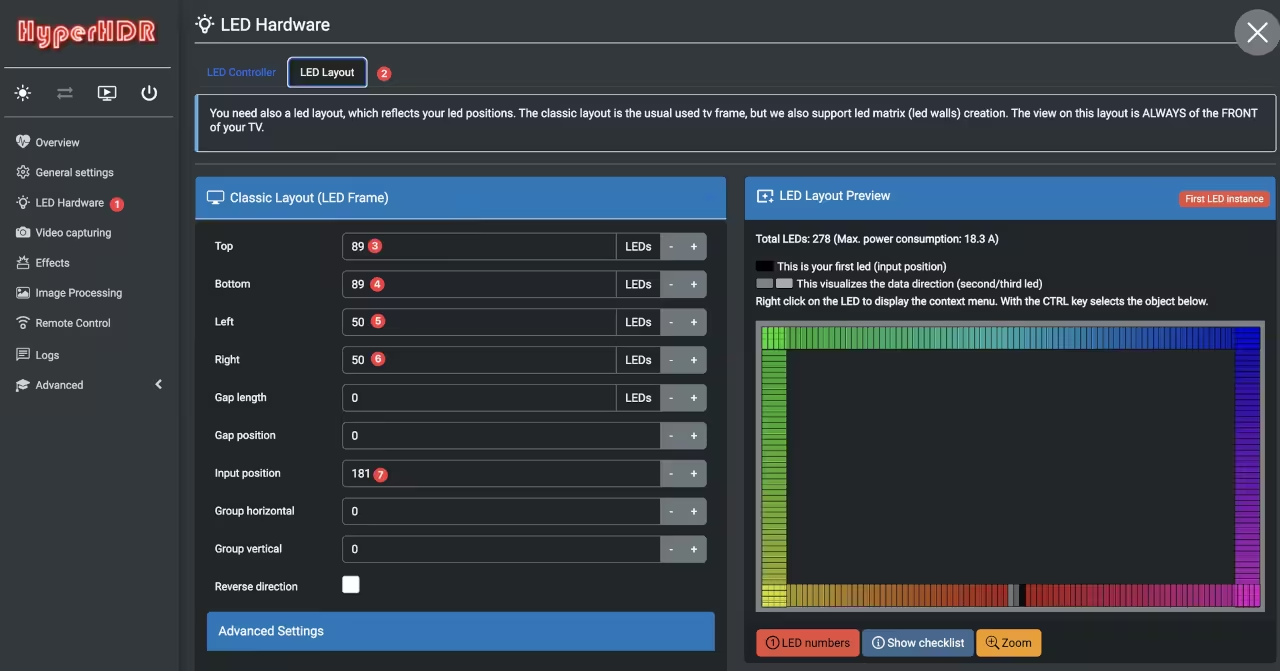
Finally you have to configure the LED layout to match your LED strip configuration:
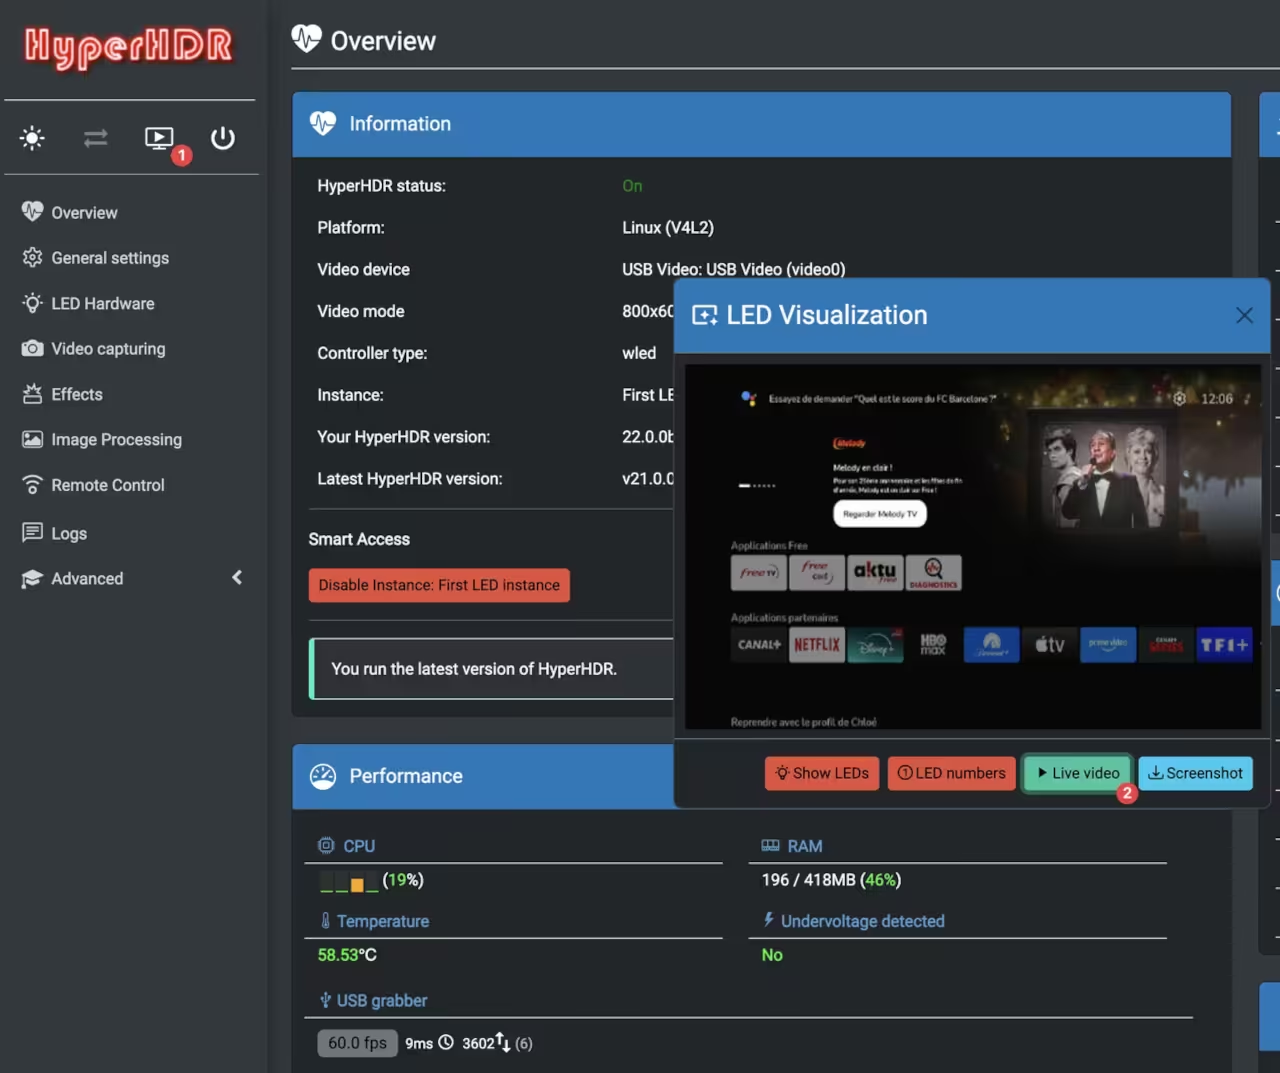
LED visualisation (check)
You can check the capture and LEDs with the LED visualisation:
Troubleshooting
Test your video capturing colors
You can test your video capturing colors by running video like color wheel on YouTube.
Swapped colors
I encountered a problem with my Raspberry Pi Zero 2W where the colors are swapped. It looks to be a kernel issue and the only solution I've found is to revert to a working kernel:
Then reboot.
Note
I've tried many times tweaking with v4l2-ctl but I couldn't get something as good as downgrading the kernel.