 |
|
| Software version |
|
| Operating System |
Debian 7/8 |
| Website |
Yubikey Website |
| Last Update |
22/04/2015 |
| Others |
|
1 Introduction
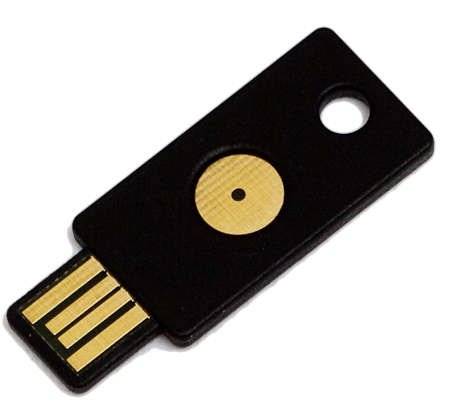
I've bought Yubikeys to manage several things. They permit 2 different kind of authentications per key. The authentication methods are:
- Yubico OTP
- OATH-HOTP
- Static Password
- Challenge-Response
The thing I wanted to do is authentication through my Yubikey without password, but still the possibility to connect my user password if I loose my key. And the other thing is to lock my computer if I remove the key.
2 Installation
To install, we'll use packages. One for pam and the GUI for configuration :
 aptitude aptitude
|
aptitude install yubikey-personalization-gui libpam-yubico |
3 Configuration
3.1 Challenge-Response
3.1.1 Gui
We're now going to configure the key. Insert it and launch gui :

|
yubikey-personalization-gui |
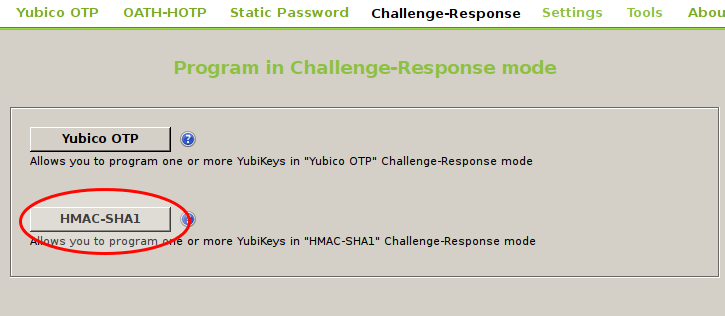
Select the challenge-response menu and SHA-1 challenge :

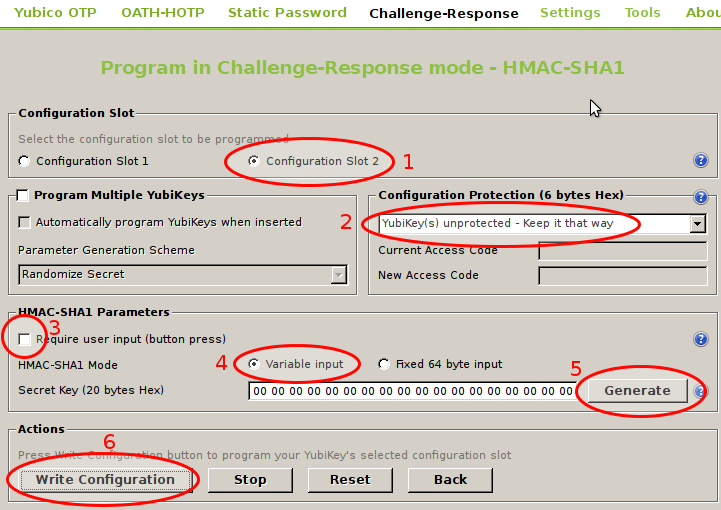
Then select all things like in the screen below :

The 3 step, if checked, need a 2,5 key press to unlock.
Then save the challenge-response to your user settings :
 ykpamcfg ykpamcfg
|
|
|
3.1.2 pam
The configuration of pam is quick and easy, simply add this line :
 /etc/pam.d/common-auth /etc/pam.d/common-auth
|
#
# /etc/pam.d/common-auth - authentication settings common to all services
#
# This file is included from other service-specific PAM config files,
# and should contain a list of the authentication modules that define
# the central authentication scheme for use on the system
# (e.g., /etc/shadow, LDAP, Kerberos, etc.).  The default is to use the
# traditional Unix authentication mechanisms.
#
# As of pam 1.0.1-6, this file is managed by pam-auth-update by default.
# To take advantage of this, it is recommended that you configure any
# local modules either before or after the default block, and use
# pam-auth-update to manage selection of other modules.  See
# pam-auth-update(8) for details.

# here are the per-package modules (the "Primary" block)
auth    sufficient           pam_yubico.so  mode=challenge-responseauth    [success=2 default=ignore]      pam_unix.so nullok_secure
auth    [success=1 default=ignore]      pam_winbind.so krb5_auth krb5_ccache_type=FILE cached_login try_first_pass
# here's the fallback if no module succeeds
auth    requisite                       pam_deny.so
# prime the stack with a positive return value if there isn't one already;
# this avoids us returning an error just because nothing sets a success code
# since the modules above will each just jump around
auth    required                        pam_permit.so
# and here are more per-package modules (the "Additional" block)
auth    optional                        pam_cap.so
# end of pam-auth-update config |
3.1.3 udev
We'll install the udev rule :
 cp cp
|
cp /lib/udev/rules.d/69-yubikey.rules /etc/udev/rules.d/ |
and override it to add a custom script (screensaver lock) :
 /lib/udev/rules.d/69-yubikey.rules /lib/udev/rules.d/69-yubikey.rules
|
ACTION!="add|change", GOTO="yubico_end"

# Udev rules for letting the console user access the Yubikey USB
# device node, needed for challenge/response to work correctly.

# Yubico Yubikey II
ATTRS{idVendor}=="1050", ATTRS{idProduct}=="0010|0110|0111|114|116", \
    ENV{ID_SECURITY_TOKEN}="1"
 LABEL="yubico_end" # Launch on removeACTION=="remove", SUBSYSTEM=="usb", ENV{ID_VENDOR_ID}=="1050", ENV{ID_MODEL_ID}=="0010", RUN+="/path/yubi_remove_script.sh"
# Launch on insert
# ACTION=="add", SUBSYSTEM=="usb", ATTRS{idVendor}=="1050", ATTRS{idProduct}=="0010", RUN+="/path/yubi_add_script.sh" |
You can test if udev see correctly your key with that command (try to insert and remove it) :
 udevadm udevadm
|
udevadm monitor --property |
Then reload udev rules :
 udevadm udevadm
|
udevadm control --reload-rules
udevadm trigger |
And create the script where you've declared it :
 yubi_script.sh yubi_script.sh
|
#! /bin/bash
export DISPLAY=":0"
su <username> -c "/usr/bin/xscreensaver-command -lock" |
And change the username by your wished one. Do not forget to add rights :
 chmod chmod
|
|
|
4 FAQ
4.1 How do I enable debug ?
It's easy to add debug mode. Simply add "debug" to the pam line :
 /etc/pam.d/common-auth /etc/pam.d/common-auth
|
#
# /etc/pam.d/common-auth - authentication settings common to all services
#
# This file is included from other service-specific PAM config files,
# and should contain a list of the authentication modules that define
# the central authentication scheme for use on the system
# (e.g., /etc/shadow, LDAP, Kerberos, etc.).  The default is to use the
# traditional Unix authentication mechanisms.
#
# As of pam 1.0.1-6, this file is managed by pam-auth-update by default.
# To take advantage of this, it is recommended that you configure any
# local modules either before or after the default block, and use
# pam-auth-update to manage selection of other modules.  See
# pam-auth-update(8) for details.

# here are the per-package modules (the "Primary" block)
auth    sufficient           pam_yubico.so  debug mode=challenge-responseauth    [success=2 default=ignore]      pam_unix.so nullok_secure
auth    [success=1 default=ignore]      pam_winbind.so krb5_auth krb5_ccache_type=FILE cached_login try_first_pass
# here's the fallback if no module succeeds
auth    requisite                       pam_deny.so
# prime the stack with a positive return value if there isn't one already;
# this avoids us returning an error just because nothing sets a success code
# since the modules above will each just jump around
auth    required                        pam_permit.so
# and here are more per-package modules (the "Additional" block)
auth    optional                        pam_cap.so
# end of pam-auth-update config |
and create debug file informations :

|
touch /var/run/pam-debug.log
chmod 666 /var/run/pam-debug.log |
You now can try to look at /var/run/pam-debug.log file.
4.2 USB error: Access denied (insufficient permissions)
A possible solution is to add a group to udev and makes your user belong to that group. Example :
 /etc/udev/rules.d/70-yubikey.rules /etc/udev/rules.d/70-yubikey.rules
|
ACTION=="add|change", SUBSYSTEM=="usb", ATTRS{idVendor}=="1050", ATTRS{idProduct}=="0010", MODE="0664", GROUP="yubikey" |
Here you need to create a "yubikey" group and add your current user to that group.
Now reload the rules :
 udevadm udevadm
|
udevadm control --reload-rules
udevadm trigger |
It should works now.
5 References
http://craoc.fr/doku.php?id=yubikey#configuration_de_la_yubikey


